Activate instance
Activation is required
Any new ActiveServer instance needs to be activated before it can process authentication requests.
To activate the ActiveServer instance:
1. Purchase a license from GPayments
You will need to purchase a license from GPayments to access the MyAccount features for activating your instance. For further details, please contact us at sales@gpayments.com.
2. Setup your instance
Follow the Quickstart Guide and ensure your ActiveServer instance is set up and you can access the administration interface.
3. Configure the External URL and Auth API URL
On the administration interface, navigate to Settings > System and enter the External URL and Auth API URL values
External URL - publicly accessible URL in which your ActiveServer instance is running and you have configured to listen on the
as.server.https.port. Note that depending on your load-balancing setup your External URL may not not have the port number included e.g.https://admin.myserverinstance.com.API URL - URL used to receive authentication and administration API calls. The domain name of this URL will also be used to generate client certificates for the authentication of APIs (x.509). If it is not provided by default ActiveServer will use the domain name in the External URL for client certificate generation. Note this URL does not have to be publicly accessible. The form of the URL is the same as the External URL, with the port number being the API port.
Select the Save button.
4. Register server and choose an Activation Method
- Login to MyAccount. If you have purchased a license from GPayments, you should already have access to the ActiveServer section.
- Select ActiveServer > My Instances on the side menu.
Select ADD NEW SERVER. You should see a screen similar to the one below, which displays the input field for the Server Name.
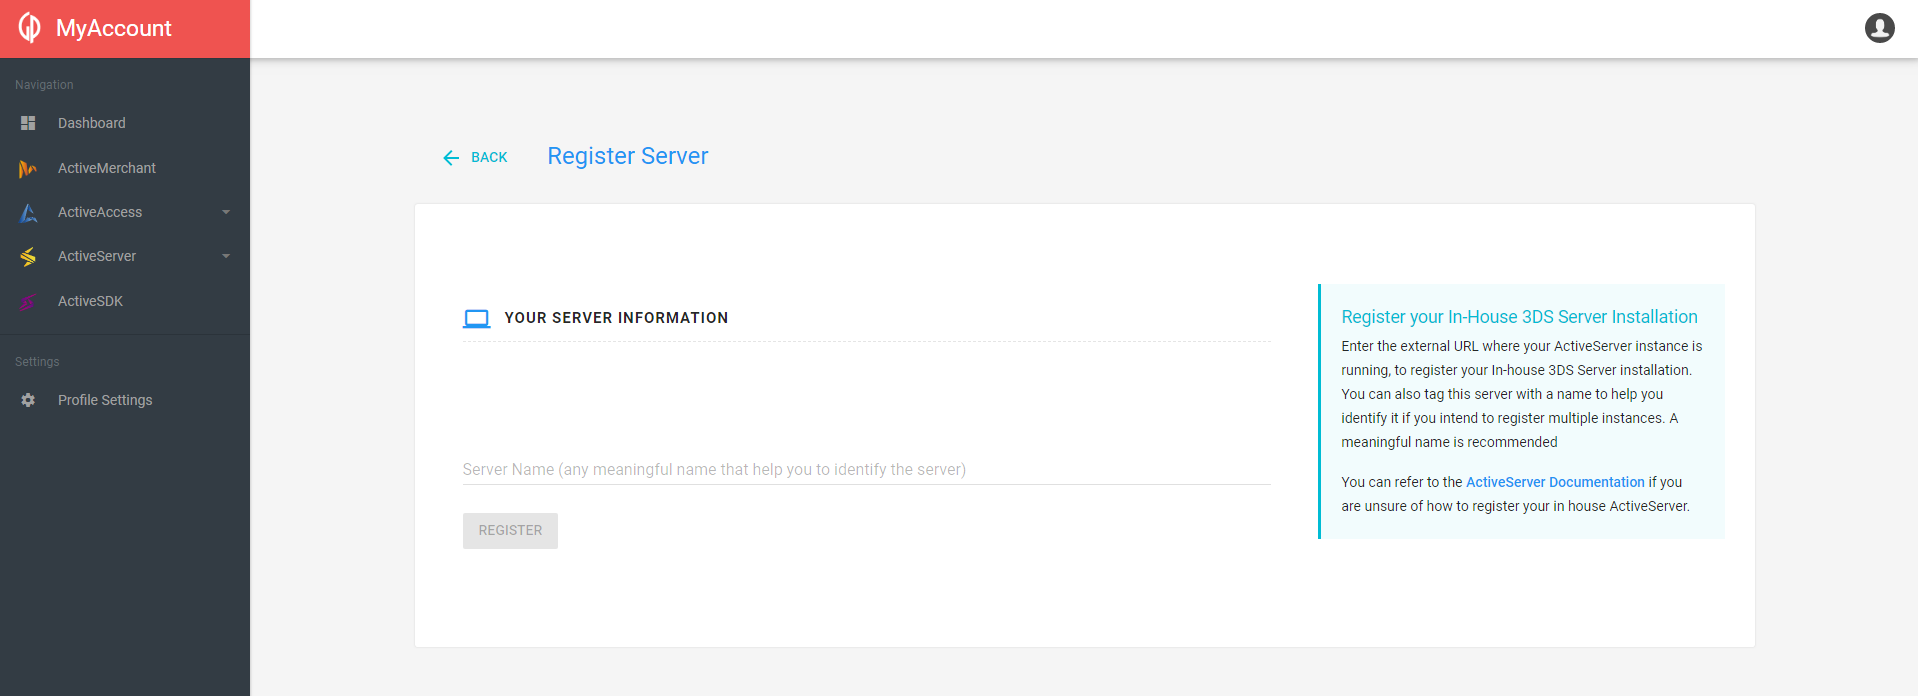
Select REGISTER. You should see the server information displayed that was just entered, along with the Activation State. If you made a mistake and would like to remove this instance, select REMOVE.
Select ACTIVATE 3DS SERVER. You will be asked to choose one of the activation methods below:
OPTION 1: Activation using session
If you choose this method, make sure the External URL you specified in the previous step is publicly accessible.
The licensing server will make a request to this External URL to verify that your instance is running on the External URL you have specified and activate the instance.
OPTION 2: Activation using DNS
This activation process activates your ActiveServer instance by verifying the
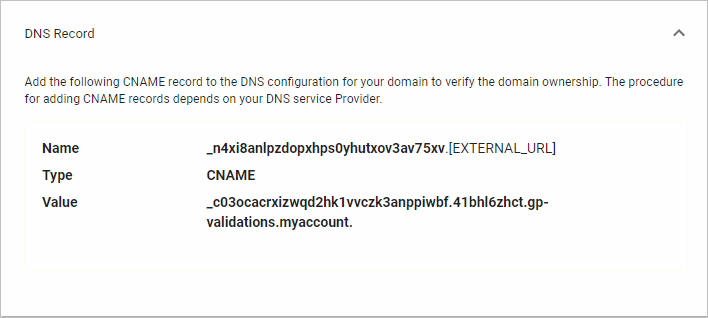
CNAMErecord generated by GPayments' licensing server.You should see a DNS record similar to the one below:
To create a DNS record:
- Go to your domain’s DNS records.
- Add a record to your DNS settings, selecting CNAME as the record type.
- Copy the value of Name, which in the above screenshot is
_n4xi8anlpzdopxhps0yhutxov3av75xv, and paste it to Label/Host/Name in the DNS record depending on your domain host. - Copy the value of Value, which in the above screenshot is
_c03ocacrxizwqd2hk1vvczk3anppiwbf.41bhl6zhct.gp-validations.myaccount., and paste it to Destination/Target/Value depending on your domain host. - Save your record. The CNAME record changes can take up to 72 hours to take effect, but typically they happen much sooner.
Note
Your domain host is typically where you purchased your domain name (e.g. AWS Route 53, GoDaddy®, Enom®, or Name.com).
Select the data elements to be sent to the licensing server by either choosing to send all data elements, or customise the data elements sent:
Transaction data (core): Information that is required for billing purposes, mandatory (or conditional) to send.
ID Name Mandatory Group Comments ADE001 Directory Server Type Y Core Used to track if the authentication request was sent to a Production or GPayments TestLabs’ directory server. ADE002 3DS Server Transaction Id Y Core ID assigned by the 3DS Server to a transaction, used for cross referencing a transaction if a billing dispute arises. ADE003 SDK Transaction Id C Core Conditional: Only assigned for SDK transactions, must be provided if a value is present, used for cross referencing a transaction if a billing dispute arises. ADE004 ACS Transaction Id Y Core ID assigned by the ACS to a transaction, used for cross referencing if a billing dispute arises. ADE005 Transaction Status Y Core The transaction status, can be “Y” or “A” or “N”, etc. This is used to determine the final transaction status for billing purposes (i.e. error occurred during transaction). ADE006 Transaction Status Reason C Core Conditional: Reason for transaction failing, assists with identifying the exact reason for failure for billing purposes, must be provided if a value is present (i.e. transaction has failed). ADE007 Transaction Start Time Y Core Transaction start time, required when determining the billing cycle. ADE008 Transaction End Time C Core Conditional: Transaction end time, could be null if the transaction failed or terminated earlier, required if available. Transaction data (extended): Information that is optional, unless conditionally required for billing purposes. Opting in to this information will allow GPayments to share anonymous industry insights with participating clients.
ID Name Mandatory Group Comments ADE009 Payment Network N Extended Payment network used for the transaction, e.g. American Express, China UnionPay, Discover, JCB, Mastercard, Visa, etc. Optional for clients to provide, unless billing structure requires this information. ADE010 Device Channel N Extended Device used for the transaction, e.g. BRW, APP, 3RI. Optional for clients to provide, unless billing structure requires this information. ADE011 Authentication Type N Extended Authentication type used for the transaction e.g. NPA (Non-payment) or PA (Payment). Optional for clients to provide, unless billing structure requires this information. ADE012 Merchant Id C Extended The internal Merchant ID (not acquirer assigned ID). Conditional for clients to provide if billing structure requires this information, used for Licensing Server to determine the size of the payment gateway (By calculating distinct merchant IDs). ADE013 Merchant Acquirer Id Index C Extended The index number of the Acquirer Merchant ID of the Merchant. Conditional for clients to provide if billing structure requires this information, used for Licensing Server to determine the size of the payment gateway (By calculating distinct merchant IDs). Tech support data (core): Information used by GPayments for troubleshooting and planning purposes, required to send unless conditionally not available on instance server.
ID Name Mandatory Group Comments AD001 ActiveServer Version Y Core Version of ActiveServer, e.g. v1.0 AD002 OS Name C Core Name of the OS, e.g. Ubuntu AD003 OS Version C Core Version of the OS, e.g. 16.04.5 LTS AD004 Database Name C Core Name of the database e.g. MySQL AD005 Database Version C Core Version of the database e.g 5.7 AD006 Java Edition and Version C Core Edition of version of Java used e.g. OpenJDK 1.8.120 AD007 Node Count C Core Number of nodes for the instance e.g. 2 Review the information provided to activate the instance and select BACK if any changes are required, otherwise select FINISH.
5. Activate
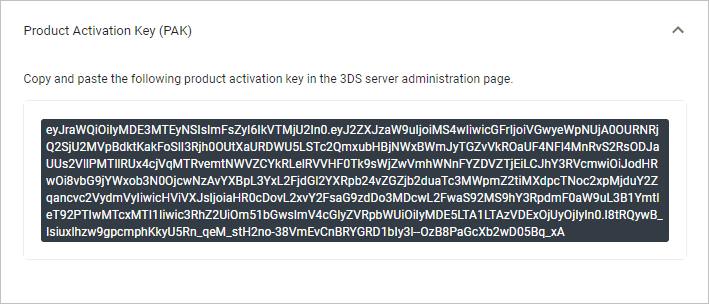
You should see a product activation key (PAK), similar to the one below.
Copy this value to your clipboard to use shortly.
Go back to your ActiveServer dashboard, navigate to Deployment > Activation Status to fill in the details from MyAccount:
- MyAccount Login Name: Email address registered for the account activating the instance.
- PAK: Product activation key, which you have copied to your clipboard.
Select the ACTIVATE button. The Activation Status will change to Waiting to restart if successful.
Restart your instance for the changes to take effect and the activation process to complete. The screenshot below shows an example Activation status in section
Deployment->Activation statuson Administration UI after restart.
Success
Congratulations! You've successfully activated your ActiveServer instance.