Introduction
The Integration guide set of documents will take you through the process of integrating the 3DS2 authentication flow with a sample merchant checkout site from the beginning. This is to implement the 3DS Requestor and 3DS Client in the merchant checkout process which is called 3DS Requestor Environment in the EMV 3DSecure 2.0 specification.
This integration guide is based on the provided demo 3DS requestor project which consists of two parts:
- The HTML/javascript frontend, contains a demo online shop and test pages for
BRW,3RI,App, andEnrolAPI calls. - The backend, which hosts the frontend pages and resources as well as performing the page forwarding and calling the ActiveServer authentication API with
x509authentication.
For reference, the frontend web pages and javascript implementation uses the following framework/components:
Javascript disabled browser
ActiveServer supports a no-script environment as well. If you want to cater for a cardholder's browser that doesn't support javascript, or you want to implement a 3DS Requestor in a no-script environment, refer here for the requestor demo overview.
Prerequisites
The following are prerequisites to using this guide:
- Web front-end development knowledge (HTML, CSS, Javascript)
- A Git client
- An activated and running ActiveServer instance
- Core programming knowledge of Java, PHP, C# or Go
Checkout the sample code
The 3DS Requestor demo code is hosted in GitHub and can be cloned from the following repository:
https://github.com/gpayments/gp-3ds-requestor-demo.git
To check out the sample code, execute the following command on your local environment:
1 | git clone https://github.com/gpayments/gp-3ds-requestor-demo.git |
Once the repository is cloned, you will find all the required demo code of this tutorial under the directory:
1 2 3 | $ cd gp-3ds-requestor-demo
gp-3ds-requestor-demo $ ls
dotnet go java php README.md
|
GPayments currently provides backend example code for Java, PHP, C#, and Go. Throughout the integration guides, wherever the instructions differ between backend languages a tab will be shown with the relevant instructions.
All backend examples utilise the same front end code, which is written using Javascript and utilises Mustache for templating.
Tip
For simplicity and demo purposes, the demo 3DS Requestor code is implemented with most of the processes and page callback logic in the web frontend code. The backend code remains as a simple server side page forwarding/x509 authentication client to connect with the ActiveServer authentication API. In your actual implementation, you may design and implement your own 3DS Requestor code to fit your existing checkout process and work flow with different frontend and backend code structure.
Server Side Dependencies
For server side 3DS Requestor demo code, depending on different languages, the following dependencies and libraries are required to be installed prior to your first demo 3DS Requestor run:
| Language | Dependencies and tools | Notes |
|---|---|---|
| Java | JDK 1.8 Apache Maven - https://maven.apache.org/install.html | |
| C# | Visual Studio 2013 or later with ASP.NET and web development workload Nuget is installed, refer to https://docs.microsoft.com/en-us/nuget/install-nuget-client-tools#visual-studio | Windows system required |
| PHP | PHP 7.2 with cURL (Client URL Library) Composer - https://getcomposer.org Guzzle - http://docs.guzzlephp.org OpenSSL | |
| Go | Go 1.12 with gin-gonic | Install Go 1.12 from https://golang.org/ |
Get client certificate
Before the backend can call the ActiveServer authentication API and authenticate itself, a client certificate is required to be setup. With this client certificate, the backend can setup a mutually authenticated TLS connection with ActiveServer.
To obtain the client certificate from your ActiveServer instance, refer here. If you do not have access to an instance and are using the GPayments TestLabs, email us at techsupport@gpayments.com to obtain a certificate.
Copy the downloaded certificate and configure the backend for the location you chose. The client certificate does not have to be in the demo 3DS Requestor directory, however you may find that storing the client certificate within the project may be easier for you to manage.
To check the directory structure of the project, refer to Directory Tree for details.
Demo 3DS Requestor Configuration
To run the demo 3DS Requestor, the following configuration needs to be set before booting up the system:
The 3DS Requestor needs to know the entry point of ActiveServer authentication API and the base url of itself so that it can tell ActiveServer which entry point of the 3DS Requestor to send the callback URLs.
Configure the
AsAuthURLandBaseUrlin your backend resource file. These values will be used when the application is brought up and cannot be changed without restarting the application:- AsAuthURL: set to the API URL of your ActiveServer instance. If you are using the GPayments TestLabs to test, leave the default value.
- BaseURL: url that the application will be brought up and accessed on.
1
2
3
4
5
//application.yml
gpayments:
  asAuthUrl: https://api.as.testlab.3dsecure.cloud:7443
  baseUrl: http://localhost:8082
  ...
1
2
3
4
5
//Web.config
<appSettings>
<add key="AsAuthUrl" value="https://api.as.testlab.3dsecure.cloud:7443"/>
<add key="BaseUrl" value="http://localhost:8082"/>
...
1
2
3
4
//application.ini
asAuthUrl = https://api.as.testlab.3dsecure.cloud:7443
baseUrl = http://localhost:8082
...
1
2
3
4
5
//application.yml
gpayments:
  asAuthUrl: https://api.as.testlab.3dsecure.cloud:7443
  baseUrl: http://localhost:8082
  ...
Tip
If the default port used in the examples is in use you may get an error, in which case configure the
portandbaseUrlto a suitable value.Configure the
certFileNamein your backend resource file to your downloaded certificate:If using a Merchant client certificate:
- Configure the
certFileNameto the full filename and path of the downloaded certificate - Set the
certFilePasswordto the client certificate keystore password which was set during certificate download in your backend resource file - Set
groupAuthtofalse - Leave the
merchantTokenas blank
- Configure the
If using a Master Auth API client certificate:
- Configure the
certFileNameto the full filename and path of the downloaded certificate - Set the
certFilePasswordto the client certificate keystore password which was set during certificate download in your backend resource file - Set
groupAuthtotrue - Configure the
merchantToken. Details of the merchant token can be found here
Warning
If
groupAuth = true, the back-end needs to add a HTTP Header in the HTTP Request with a field ofAS-Merchant-Tokenwhich is set to the merchantToken. To check the details of this implementation, refer to the Back-end implementation (v1) or Back-end implementation (v2) guides.- Configure the
1
2
3
4
5
6
7
//application.yml
gpayments:
  ...
  certFileName: # Client Certificate file (.p12 or .pfx) path
  certFilePassword: # Client Certificate password
  groupAuth: false
  merchantToken: # Your merchantToken when groupAuth = true
1
2
3
4
5
6
7
8
9
//Web.config
<appSettings>
...
<!--Full file name and path of the client certificate (.p12 or .pfx)-->
<add key="CertFileName" value=""/>
<add key="CertFilePassword" value=""/>
<add key="GroupAuth" value="false"/>
<!--Your MerchantToken when GroupAuth = true-->
<add key="MerchantToken" value=""/>
1
2
3
4
5
6
7
8
//application.ini
;Client Certificate file (.pem) path generated using openssl command
certFileName =
;Path to Private key path generated using openssl command without password
keyFileName =
groupAuth = true
; Your merchantToken when groupAuth = true
merchantToken =
1
2
3
4
5
6
7
//application.yaml
gpayments:
  ...
  certFileName: <Full file name and path of the client certificate>
  certFilePassword: <The password for the client certificate>
  groupAuth: false
  merchantToken: # Your merchantToken when groupAuth = true
Note
You can place the client certificate in any location you prefer. For example, for a client certificate file located in the
C:/Downloadsdirectory (for windows platforms) with the file nameclient_certificate.p12, you should change thecertFileNameto beC:/Downloads/client_certificate.p12.Note: For
PHP, please follow the instruction here to extract the private key and certificate.Open a Terminal (Linux, for Java, PHP or Go), Command Prompt (Windows, for Java, PHP or Go) or Developer Command Prompt (Windows, for C#) and execute the following command line on the root directory of the project. Note that this could take a few minutes the first time it is run if any dependencies are required to be download:
1
2
$ cd java $ mvn spring-boot:run1 2
> cd dotnet > startup.bat
1 2 3 4
$ cd php
$ curl -sS https://getcomposer.org/installer | php
$ php composer.phar install
$ php -S localhost:8082
1
2
$ cd go
$ go run .
Firewall warnings for Java Network access in Windows
In Windows you may encounter a Windows Firewall security alert regarding the Java network access, allow access to continue.
View 3DS Requestor website
Once the client certificate and the URLs are configured properly, and the startup command has been executed, the demo 3DS Requestor should be started up successfully. You can view the 3DS Requestor page by accessing http://localhost:8082 (or the BaseURL specified above):
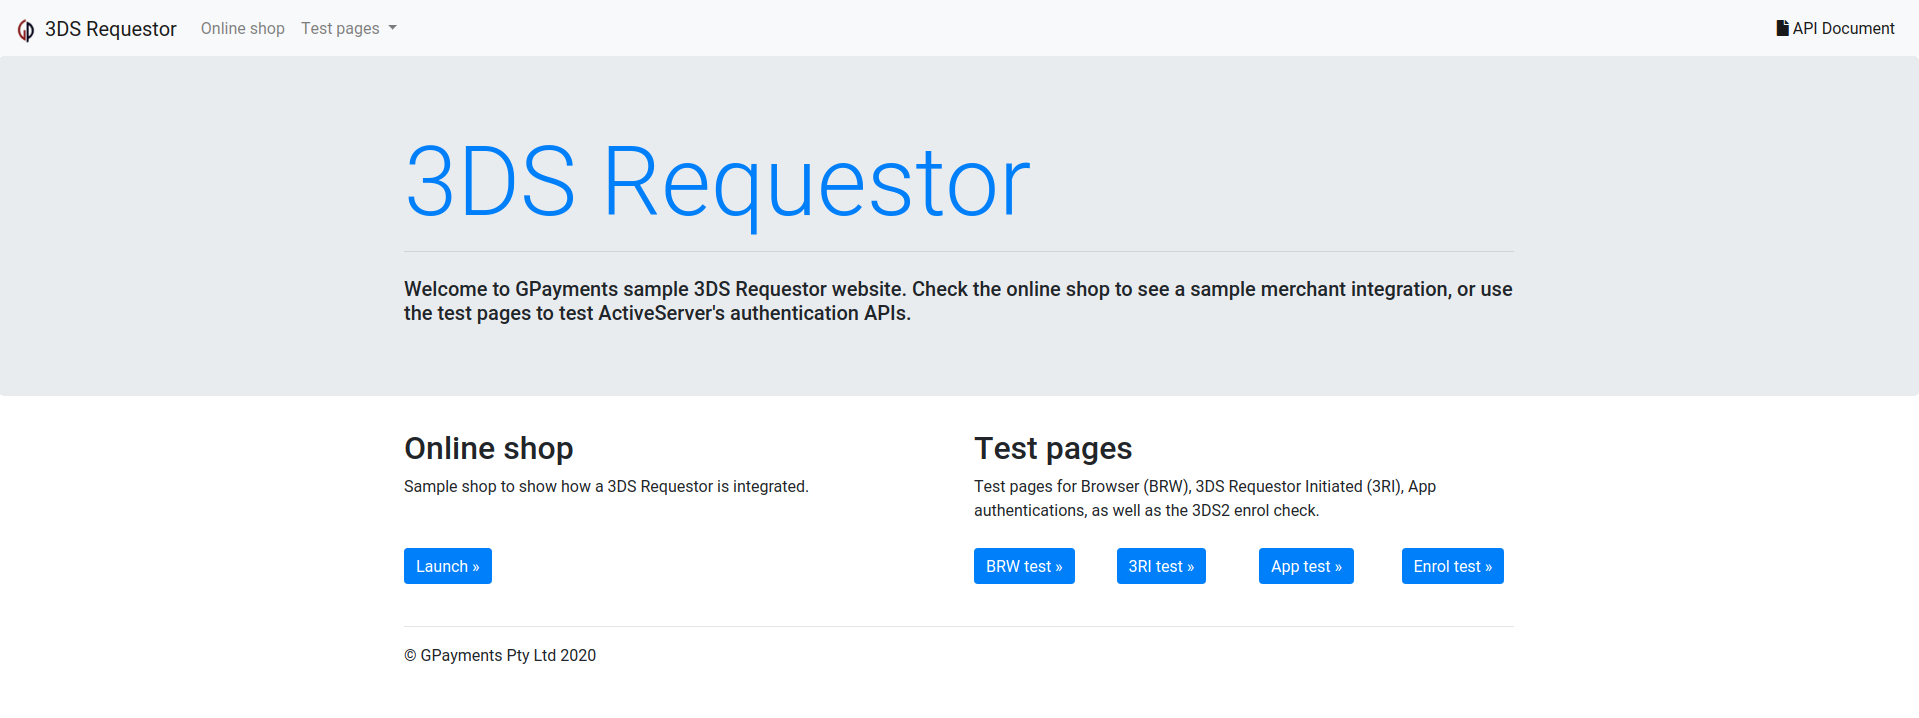
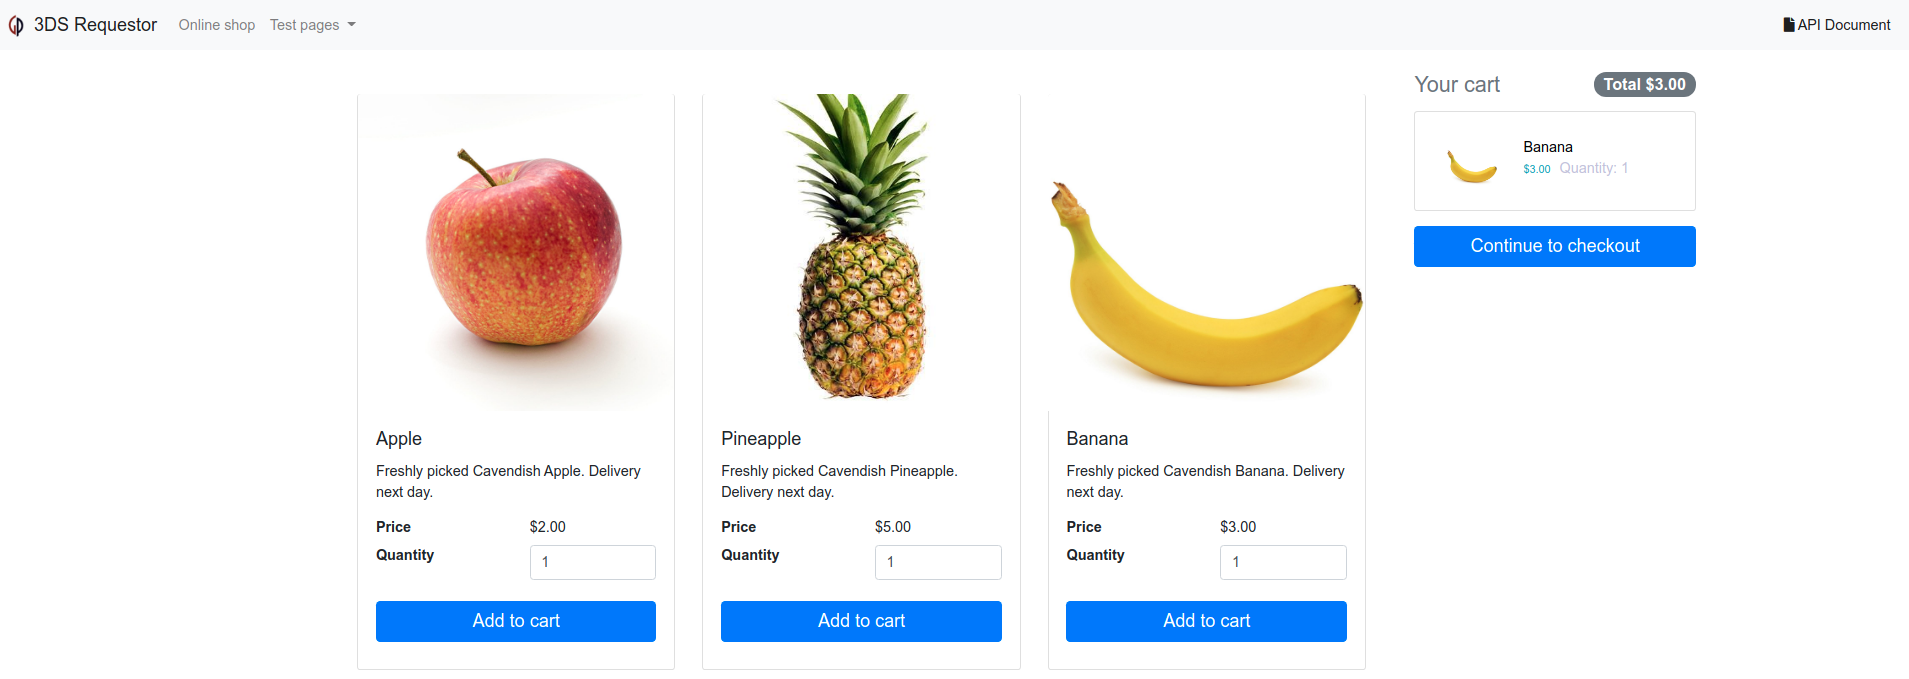
Select the Launch button under Online shop to open the shop page. Try adding some items to the cart and checkout using the default cardholder information:
The demo 3DS Requestor then shows the checkout page:

Proceed with the Checkout button, the demo 3DS Requestor will show the progress screen:

Then finally show the result page (note depending on the card number used, you may be prompted for a challenge screen, check Sample code feature for details):
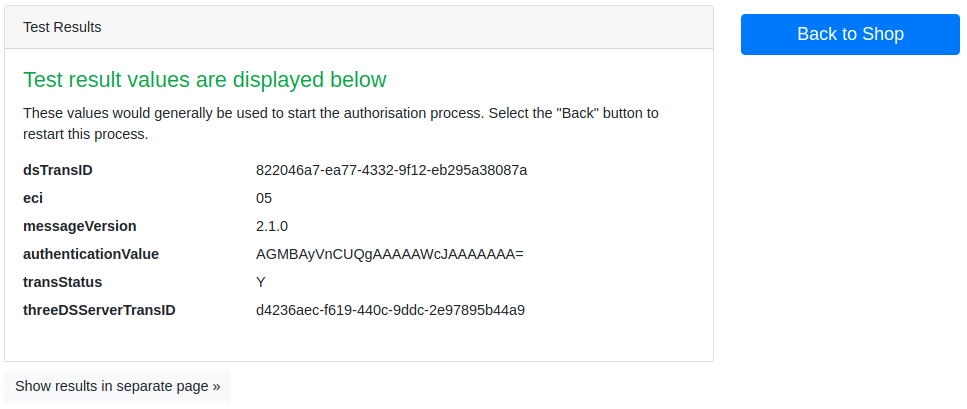
Congratulations! You just successfully ran and tested your first demo 3DS Requestor locally.
Warning
You may notice that the demo 3DS Requestor is running on HTTP. This is just for demo purposes and this code is not suitable for production.
Support
If you have any questions after reading this document, we are here to help. Please email us at techsupport@gpayments.com.
Whats next?
Select Next to learn about the v2 Front-end implementation for a 3DS Requestor.